Exposure Compensation
Exposure compensation doesn't have a user-friendly name, but once you realize its potential you might find yourself using it all the time.
When I provide advice to new DSLR owners, the most important concept that I emphasize is this: YOU control how your photos look, not your camera.

This concept applies to every single digital SLR camera out there, new and old, simple to professional.
While more professional cameras provide you with even finer control over how your photos look, there is one basic control available on every single camera ever made that you can leverage to dramatically change the look of your images.
This control that I speak of is exposure.
If you just let your camera do what it wants (aka – put it in AUTO mode) then it will try to capture photos that are "correctly" exposed. This means that the image is neither too bright nor too dark: there is an even balance between the two.
It's easy for a camera – or rather, the computer inside the camera – to get the exposure correct in a traditional sunlit situation. But when the available light is not optimal, then your camera can start making choices that you're not happy with.
What is "Non-Optimal" Light?

The most extreme example of non-optimal light is this one: you're trying to take a portrait but the sun is directly behind your subject. This light is aptly named "backlighting".
In a backlit situation, your camera will have a VERY tough time in AUTO mode figuring out what a correct exposure should be. On the one hand, there is a very bright light source right behind your subject, but the side of the subject facing you is quite dark.
Often, cameras will decide to optimize the exposure for the bright light, making your subject extremely dark.
While this is one of the most challenging types of light for a digital SLR to deal with, there are others that you will encounter as you take more pictures:
- Strong side light
- Bright sun mixed with deep shade
- Deep shade
- Full overcast (dark clouds)
Every single one of these has the potential to upset a balanced exposure resulting in an image that you're not happy with.
Taking Control With Exposure Compensation
So here's some good news: you don't need to be a professional photographer (or even an intermediate for that matter) to adjust exposures yourself.
Let's get a simple definition out of the way first: exposure compensation allows you (the photographer) to tell your camera (the machine) HOW you want your photo to look.
Put another way: when you "compensate" the exposure you are intentionally telling the camera that you want your photo to be brighter or darker than what it thinks is "optimal".
There's a scale for the compensation that typically runs from -2 (very dark) to +2 (very bright). On some cameras it will be -3 to +3.
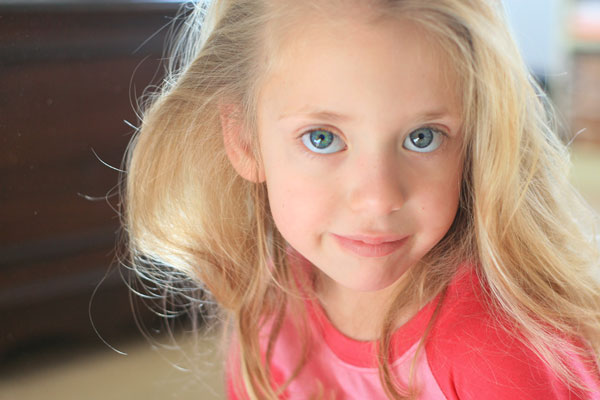
Let's take a look at an example. This first image is taken with no compensation – I'm just letting the camera do what it wants.

This second photo shows what happens when I compensate to make the image darker (-1).

This last photo shows a photo that's brighter by +1.

How to Set Exposure Compensation
You can play around with exposure compensation by setting your camera to one of three manual modes: Program (P), Aperture Priority (A or Av) and Shutter Priority (S or Tv).
In these three modes, you just need to figure out the control on your DSLR to adjust exposure compensation. In some cases, you'll just have to turn a dial and in others you'll have to press and hold a button while you turn a dial.
Regardless of how your camera works, turning the dial in one direction will increase image brightness (positive compensation) while spinning the other way will decrease image brightness (negative compensation).
Just remember that after you're all done fiddling around with exposure compensation, set it back to zero. Otherwise you might get a nasty surprise if you put your camera away and forget that you adjusted the exposure.
Playing With Exposure
Now you know WHEN to use exposure compensation (in challenging light) and HOW to set it on your particular camera.
It's time to have some fun with exposure, and get back to what I mentioned at the top of this article: taking manual control over exposure is one of the most important photographic concepts for you to master.
Any time you want your photo to express a mood, you'll get much better results when you set the exposure yourself.
When you want your photo to look somber and for colors to be rich and saturated, decrease the exposure.

When you want your photo to be bright and for the colors and contrast to wash out a bit, increase the exposure.

Adjust exposure for all kinds of subjects including portraits, landscapes, nature and still life.
Taking manual control of this one setting allows you to match the photos you take much more closely to the image you have in your mind's eye. Everyone using your DSLR can take pictures with "optimal" exposure, but with exposure compensation you can be different from the pack.
End result: pictures that are uniquely yours because they have a touch of personality in them.
Join Our Community!
- Learn more about your digital SLR camera
- Get other opinions about camera models
- Share your photos and get feedback
- Learn new DSLR tips and tricks


