
April 27, 2007
Having trouble viewing this newsletter? Read the latest issue online at
/dslr-news.html
If someone you know has forwarded you this newsletter and you've enjoyed it, subscribe now to receive the next issue when it's published.
DSLR News - April 2007If you're a regular reader of this digital SLR newsletter then I can only guess one of two things about you:
If you fall into the second category, then what follows will be primarily for you (but those on the verge of an SLR purchase should also take note). Today's introduction is going to focus on the real benefit to be obtained by taking MANUAL control of your camera. Over the years, I've spoken to a lot of digital photographers, compact point-and-shoot and digital SLR owners alike. Many tell me the same thing: "my camera works just fine in AUTO mode, so that's where I've always left it." While this makes sense for many compact digital cameras - after all, they're supposed to be easy to use - I imagine that you made the move to a digital SLR because you weren't satisfied with the photos you were getting from your compact digicam. If that's the case, then you really owe it to yourself to take your SLR out of AUTO mode and really leverage every feature that it offers. But why? AUTO mode works just fine right? Not always. Example: I often receive e-mails like this one: "I've set my camera to the sports mode, but the photos that I've taken of my labrador in my shady backyard are still turning out blurry. What's wrong with the camera?" Here's the problem: despite the fact that your digital SLR is a highly precise digital instrument, it STINKS at making on-the-spot decisions about camera settings, especially if the light is changing a lot. You - on the other hand - can make these types of decisions in seconds, and the ONLY thing that you need to know is which camera settings to change to get the results that you want. In the sports mode example, there's absolutely nothing wrong with the camera. It's doing everything it can to get a decent shot. But when you know about all the settings on your camera, you'll find that you rarely use any of the pre-programmed modes. Instead, if you're trying to photograph that lab in the backyard, you'll set your lens to a wide maximum aperture, and increase the ISO setting as high as you have to in order to get a fast enough shutter speed to get a crisp, clear photo. Not sure what all this aperture, ISO, shutter speed babble is about? I encourage you to learn - it's not all that hard, it just seems that way when you get stuck in a photo forum where everyone already seems to know what they're talking about. Once you take your camera out of AUTO mode, you're opening yourself up to a limitless word of photographic possibilities. Where you take it from there is entirely up to you.
|
In This Issue
Latest SLR Guides
Canon Rebel xTi
Nikon D40
Sony ALPHA A100
Digital SLR Terms
Megapixels
Anti-Shake
ISO / Image Noise
Sensor Dust
Crop Factor
RAW vs. JPG
Continuous Photos
Autofocus Points
Aspect Ratio
Lens Terms
Focal Length
Prime vs. Zoom
Maximum Aperture
First vs. Third Party
SLR Lens Features
Canon Lens Glossary
Nikon Lens Glossary
|
Digital SLR Lessons
- Learn digital SLR camera jargon
- Take manual control of your camera
- Improve the quality of the photos you take
Digital SLR Q & A
I've re-worked this Q & A section a bit so that now each month I'll be answering a reader's specific question. What I previously included in the Q & A section now appears right below in a new section called "Digital SLR Technique".Question:
I'm finding a lot of great bargains on older digital SLRs, but am tempted by the latest 10 megapixel cameras. What should I do?Answer
If you're making the move from a compact digital camera to an SLR, you're going to see a huge impovement in speed which should allow you to capture a lot of photos that you could not before. You should also see an improvement in the autofocus system, which helps you get clear shots of fast-moving subjects.Since you'll get these advantages from ANY digital SLR and not just the latest models, the real questions you must answer are "how big do I want to print?" or "how much do I want to crop my photos?"
Cameras with more megapixels capture larger images, which allow you to print at larger sizes without losing image quality. You can also crop out a 50% of a 10 megapixel file and still have something that will make an exceptional 8x10 print.
Any one of the following reasons will justify the purchase of the latest 10 megapixel digital SLR:
- I want the latest camera model (and not something that's 2 years old)
- I want a special modern feature that's not offered on the older cameras (like dust control)
- I want to make HUGE prints (16x20 inches)
- I want to crop my photos and still make large prints
If you find that you don't agree with ANY of the statements above, then save yourself a TON of cash and just go looking for 6 and 8 megapixel digital SLR cameras from 2005 and 2006. Two examples of exceptional cameras that you can now find for discount prices include the 8 megapixel Olympus E-500 (which DOES have dust control) and the 6 megapixel Nikon D50 (since replaced by the D40 and D40x).
One nice thing about the older cameras is that they have a proven track record of success - what better selling point can a camera have besides thousands of satisfied photographers?
Digital SLR Technique
Welcome to the new section on digital SLR camera technique. This new part of the digital SLR newsletter was previously called Q & A, but as time goes on it's made more sense to make this into its own special section.Each month I'll be providing a new photography tip or piece of advice that will help you understand more about how your digital SLR camera works, and how to change its settings to get the most out of it.
Over the past couple of months we've been talking a lot about aperture and shutter speed, and I've introduced you to the concept of stops of light.
Quick review:
- The aperture setting changes the width of the opening in your lens and lets in more or less light. A smaller aperture number represents a LARGER opening in the lens.
- The shutter speed controls the amount of time the shutter stays open when you take a photo. As shutter speeds get faster, less light hits the camera's sensor.
- Aperture and shutter speed work together to ensure that the exposure in your photos is correct
Today, we're going to launch in a third element: ISO.
I feel that the ISO setting is one of the most powerful and under-used features on modern digital cameras. It's also what many refer to as the third point on the digital SLR exposure triangle (the other two being aperture and shutter speed).
In previous issues of this newsletter, I've established a relationship between aperture and shutter speed.
For the newcomers, the relationships is this:
- WIDER APERTURE (more light) ==> FASTER SHUTTER SPEED (less light)
- NARROW APERTURE (less light) ==> SLOWER SHUTTER SPEED (more light)
The trick to any correctly exposed photograph is that these two settings should balance each other out. With this in mind you can have any one of the following combinations for any photo that you take:
- Very wide aperture and very fast shutter speed
- Moderate aperture and moderate shutter speed
- Very narrow aperture and very slow shutter speed
But the thing that you'll find once you start really tinkering around with these setting is that there are LIMITS. The most common limit that you'll run up against is insufficient light.
Let's go back to the example I put forth back in the introduction: a labrador running around in a shady backyard.
You know that you want a REALLY fast shutter speed so that the lab doesn't come out looking blurry. How do you get that? Set a very WIDE aperture, as wide as the lens will allow.
You've just run into a limit: what's called the maximum aperture of your lens. Some lenses open significantly wider than others, and let in a LOT more light. If you're using a standard kit lens, that maximum aperture at the wide angle setting is typically f/3.5.
So you've set your aperture to f/3.5, and you take an exposure reading on that lab bounding about the backyard. Uh oh - the shutter speed that your camera has selected for a balanced exposure is 1/250th of a second. The bad news here is that 1/250th of a second is not NEARLY fast enough to get a clear shot of a dog in motion. You're going to need something closer to 1/1000th of a second.
But you've already done everything you can by opening up the lens as wide as it will go right? What else can be done?
Enter ISO. As the ISO setting increases, it makes the sensor able to absorb more light. At ISO 100, the camera is fairly insensitive to light and at ISO 3200 it's VERY sensitive.
In the example we've been working with, if you leave your aperture locked at f/3.5, but INCREASE the ISO to 800, suddenly your shutter speed is going to jump all the way up to 1/1000th of a second, and you're still going get a photo that's correctly exposed.
Think if the ISO setting as the low light booster.
Any time you're taking photos in dim lighting and the LCD display is showing you that they're all a blurry mess, set your camera to program or aperture priority mode, and boost up the ISO as high as you need it until every shot is turning out crisp and clear.
ISO does have an impact on image quality, but we'll dig deeper into that issue next month.
Learning Resource
I've been a huge fan of Photo.net for years, and if you've been cruising the web for photography information you've probably already come across this site.If you haven't, then here's the 10 second introduction.
While a large part of Photo.net is a photo sharing and critiquing community, they also provide a lot of helpful tutorials and guidance about how to improve your photography.
They also provide a lot of assistance for new camera buyers (like the Digital SLR Guide) and help you narrow down the number of cameras that you need to evaluate based on your photographic needs.
If that weren't enough, Photo.net is a huge source of inspiration for me, since many of the photographers who post take exceptionally beautiful photographs. Rather than being intimidated, I think this is a great opportunity to study what they've done and figure out how you can re-create the same image on your own.
How and When
This month's topic is When to Change Your Metering Mode.Current digital SLR owners will find the following information helpful for clarifying when they should use the relatively obscure "metering mode" setting on their digital SLR.
Prospective buyers should also take note however, because not all cameras meter alike. If you have specific photography needs, then the different metering modes a camera offers might be the tie breaker that helps you make up your mind about which SLR to buy.
What is metering?
Every time you take a photograph, your digital SLR evaluates the scenery in front of you. It takes into account both light and dark areas and tries to create a balanced exposure from all of this information. The element of the camera performing this evaluation is called a light meter.
The meter can either be spread wide to evaluate EVERYTHING that you see when you look through the viewfinder, or it can be narrowed down to just a tiny area in the direct center of the viewfinder.
There are three common metering modes on digital SLR cameras: area, center-weighted average and spot.
As you might be able to guess by their names, the area meter judges all the light that's landing on the camera's sensor, center-weighted average only checks a small circle in the center of the sensor and spot is just a tiny point.
But when to use them?
- Area metering is best used for landscape and general-use photography. With area metering activated the camera is judging the quantity of light throughout the frame. Even if there are off-center areas of light and dark, the camera will compensate accordingly.
- Center-weighted average metering is great for sports photography. In sports, you want to make sure that your subjects are correctly exposed - the background is not as important. Since you'll probably point the camera right at your subjects, weighting the light meter toward the center of the frame is a good idea.
- Spot metering is used for more specific applications, from macro photography to portraits. When you take portraits from a distance using a telephoto lens, you can ensure that the exposure on the face is accurate (regardless of how bright or dark the surroundings are) by using the spot meter.

This photo shows area metering - the camera evaluated the entire scene, and tried to keep the exposure of the sky evenly balanced with the pot in the foreground. The only problem is that the pot is in shade. In order to keep everything balanced, the camera must under-expose the pot (rendering it fairly dark).

By contrast, this photo illustrates spot metering - in this case I spot metered the pot to ensure that it would be properly exposed in the final image. End result? The sky is so over-exposed it appears completely white.
My general rule of thumb for selecting a metering mode is this: if I care that the background is correctly exposed, then I use area metering. Since this is usually the case, I use area metering about 75% of the time.
If I am less concerned about the background, but really want my subject to be correctly exposed, then I shift over to center-weighted or spot. Since I don't take a lot of photos that require the precision of a spot meter, center-weighted is a more common setting for me.
Cameras and Accessories
Latest Digital SLR

While the E-410 and E-510 include some innovative technologies, the Nikon D40x is merely a Nikon D40...with 10 megapixels.
This camera is a good choice for anyone who likes the user-friendly features included on the D40 but isn't satisifed with the 6 megapixel resolution.
Not sure what the Nikon D40 had to offer? Read the complete Nikon D40 Guide.
Digital SLR Camera of the Month
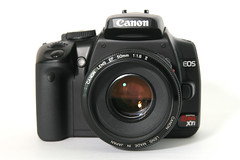
What makes this camera a desireable alternative for anyone who wants the latest in 10 megapixel digital SLR technology?
It's a small, solid camera that takes images with exceptional quality. All of the camera features are easy to change without having to dig through a lot of menus, which is ideal for advanced photographers who change settings all the time and beginners trying to figure out how the camera works.
Ex-film photographers will truly enjoy the Picture Styles feature. Different films had different color qualities - some would capture rich, saturated colors (great for landscapes) while others were designed specifically to capture accurate skin tones. Picture Styles lets you adjust how the camera captures color so that you can use different settings depending upon your subject material.
Read the complete Canon Rebel xTi Guide to find out more.
Links
Here's another new section that I've decided to add to the newsletter: a monthly collection of links to keep you posted about what's new at the Guide and in the world of digital SLR cameras.
Recent Updates to the Digital SLR Guide
- Canon EOS Rebel xTi Guide - my comprehensive introduction to this 10 megapixel digital SLR camera
- Best Lenses for Digital SLRs - find out why you shouldn't be cheap when buying a new lens, and learn more about my approach to selecting good lenses
- The Best Action Lens - action photography is demanding on the photographer, camera and lens. Find out my picks for best action lenses for each camera manufacturer
Mother's Day Gift Ideas
- Photojojo Custom Tote Bags - put your photo onto a large messenger bag or a small purse to make a custom bag like no other
- Best Digital SLR Cameras - my recommendations of two good digital SLR cameras for Moms
In Conclusion
That does it for the month of April.With the exception of the Olympus E-410, the E-510 and the Nikon D40x, there aren't too many new digital SLR cameras on the immediate horizon.
Sony has announced the release of two more digital SLR models, but those are slated for later in 2007. Rumors abound about a new Canon SLR to replace the D30, but concrete evidence of that camera's release has yet to be found.
I don't mind all that much - this is giving me the opportunity to review some older cameras, which are just as capable as their 2007 counterparts.
Speaking of which...I'm just about to put together a comprehensive guide for the Nikon D80, so keep an eye out for that in next month's newsletter or on the Digital SLR Guide Weblog.
Thanks for reading, and happy picture-taking!
--Chris Roberts, Your Digital SLR Guide