
September 25, 2007
Having trouble viewing this newsletter? Read the latest issue online at
/dslr-news.html
If someone you know has forwarded you this newsletter and you've enjoyed it, subscribe now to receive the next issue when it's published.
DSLR News - September 2007It's a great time to either be buying a new digital SLR camera, or considering an upgrade from an older model.The technology has improved by leaps and bounds over the past couple of years, and the cameras that are available today are superior in a great many ways to those that were released in 2005. The most notable change is the relentless increase in megapixels, even though most armchair photographers really don't need 10 megapixels at their disposal to capture a decent shot of the kids playing in the backyard. I used to be a dedicated advocate of the 6 megapixel digital SLR cameras, trying to convince people that more megapixels was not necessarily a good thing. The camera manufacturers have had their way however, and the most common camera you can get your hands on these days comes with 10 megapixels. If you really want to push the megapixel envelope, you can now get a camera with 12. Megapixels aside, probably the most useful new feature being added to modern cameras is the dust control system. For years I was able to keep my sensors clean by changing lenses in a fashion that bordered on the obsessive-compulsive (only exposing the sensor to the elements for a limited time). Dust did eventually find a way in, and now I either have to remove the spots with editing software or consider cleaning the sensor with a special swab. With a dust control system, this will hopefully never be a problem for you. Another new innovation is the live view LCD, which lets you use your digital SLR camera in the same way you use your point-and-shoot. This is helpful not only for those making the transition from a compact digital camera, but it also opens up a world of new angles when you don't have to compose every image by looking through the viewfinder. Now that I've used a few cameras with live view LCDs, I often find myself wanting to take photos with the camera held at arm's length. There's only one big problem with all this spiffy new technology: camera manufacturers have been able to keep prices for digital SLR cameras pretty high, making cost one of the top limiting factors for those who'd like to buy a digital SLR. Those on a strict budget will find their choices limited: your best bet for a really cheap camera will be an older model from 2005 like the Canon Rebel XT, Nikon D50, Olympus E-500 or Pentax K100D. The only two new budget SLRs are the Nikon D40 and the Samsung GX-1S (both released in 2006). With a budget closer to $1,000 you're going to have a lot more options to choose from, and can either go with a budget SLR and a slew of lenses or a modern camera with one or two kit lenses. Be warned: kit lenses are not always the highest quality and can have an impact on the quality and clarity of every photo that you take. In my digital SLR guides, I try to identify when a manufacturer's kit lens is sub-par, and I suggest higher-quality alternatives when I can. That's the high-level summary. In the next couple of months as we get closer to the holiday shopping season, I'll provide you with more details about the digital SLR market, and which cameras offer the best value for the money.
|
In This Issue
Latest SLR Guides
Olympus E-510
Nikon D80
Canon Rebel xTi
Nikon D40
Sony ALPHA A100
Digital SLR Terms
Megapixels
Anti-Shake
ISO / Image Noise
Sensor Dust
Crop Factor
RAW vs. JPG
Continuous Photos
Autofocus Points
Aspect Ratio
Lens Terms
Focal Length
Prime vs. Zoom
Maximum Aperture
First vs. Third Party
SLR Lens Features
Canon Lens Glossary
Nikon Lens Glossary
|
Digital SLR Lessons
- Learn digital SLR camera jargon
- Master the controls of your digital SLR
- Dramatically improve the quality of the photos you take
Digital SLR Q & A
Question: What's the best beginner budget SLR?
Answer
You've been longing to improve the quality of the photos you take and capture moments that just aren't possible with a compact point-and-shoot, but you find the price of digital SLR cameras extreme.I'm not surprised - back in the heyday of the film SLR, it often seemed silly to spend $300 on a camera when you could get a simple compact camera for less than $100. Now that the minimum price for a digital SLR is right around $500, it makes them pretty expensive investments.
I firmly believe that the additional cost is justified when you take into account the fact that digital SLRs are able to capture a wider variety of shots than compact cameras. It's why the SLR has been the choice of professional photographers for years.
Why tell you this? It will put my answer to the question above into some perspective.
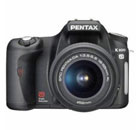
Right now, I think that the best digital SLR camera for a beginner on a budget is the Pentax K100D. Recently replaced by the K100D Super, the original K100D has benefitted from a price drop that makes it significantly more affordable.
The Pentax K100D is the least expensive camera you can buy that also includes built-in image stabilization. This feature oscillates the camera's sensor to counteract the effect of camera motion on your photos. While you can't really see camera motion when you're using fast shutter speeds with plenty of light, dim lighting and slow shutter speeds can lead to a lot of blurry shots.
Since the image stabilization is built into the camera itself, it works with every Pentax lens that's compatible with the K100D.
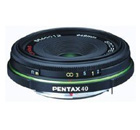
In addition to image stabilization, the 6 megapixel sensor offers plenty for anyone who doesn't want to print at sizes larger than 11x14 inches. The compact frame can be made even more so if you can get your hands on one of the specialized Pentax "pancake" lenses. These lenses don't stick out far from the camera, making the K100D a portable option for those who like to travel.
Finally, the K100D runs on regular old AA batteries, which works well if you're one of those types who always forgets to re-charge batteries before a photo outing (many other cameras use special Lithium Ion rechargeable batteries that take about 2-3 hours to reach a full charge).
You can pick up a K100D for less than $500 with a lens, and for less than $400 without a lens.
This second option works well if you already have some Pentax lenses from a film SLR camera, or know of a local camera swap where you can pick up some used Pentax lenses without paying full price.
Digital SLR Technique
For more digital SLR camera techniques, please browse through the back issues of this newsletter (especially helpful if you find me rambling about something that makes no sense).For past subscribers: please note that the following technique is something that I discussed in the January newsletter, but I've recently found out more about it and wanted to share the new information.
This month, we'll be talking about color.
You'd think that color would be a simple thing. As it turns out, keeping the colors in your photos consistent is one of the most challenging aspects of digital photography.
- The color captured by your camera's sensor can shift, depending on the available light
- The color captured by the sensor is not necessarily the same color you see on the camera's LCD
- Color viewed on a computer monitor can be quite different from BOTH the sensor capture and the LCD
- Print color may not be consistent with what you see on your monitor
I'm not going to even attempt to tackle all of these issues in this newsletter, but I will address the first one.
Here's something that's not completely obvious: even if you think that the color in your photos will be consistent, your camera on AUTO mode may think otherwise.
Take the following two photos:
 |
 |
Both of these were taken at the exact same time of day under the same lighting conditions (overcast). The camera was set to manual exposure mode and the aperture, shutter speed and ISO were the same in both of these shots (they are two consecutive photos, one after the other).
But what in the world is going on with the color? The color of the dog's fur shifts slightly from a golden orange to more of a tan.
With everything else constant, why did my camera capture the color differently in these two back-to-back shots? The answer lies in a feature called white balance.
The white balance setting on your digital SLR camera affects the way the sensor captures colors. The issue here is that the color (or temperature) of light is different depending upon the available light landing on your subject. Light temperature is measured in Kelvins, and it not only changes throughout the day, it also changes when you go from direct sunlight to shade to overcast conditions.
Left to its own devices, your camera is going to make its best guess about the lighting conditions and will set the white balance accordingly. But - as the two photos above show - sometimes the camera gets it wrong, even on two sequential photos.
The best way to get around this effect is to set the white balance yourself. You'll find that there are a couple of different options when it comes to your white balance setting, and that settings exist to match some of the lighting I've just mentioned: daylight, shade, overcast, tungsten, fluorescent, flash and custom.
When you set white balance manually, the color in your images won't fluctuate from shot to shot. This is especially important when there are mixed lighting sources: natural and tungsten, or tungsten and flash. Imagine the type of color fluctuation you'd get if the camera was setting the white balance between two completely different settings.
Here's an example of a photo taken under tungsten light, where the white balance was set to "daylight". Oh yeah, there's a slight color tint there.

Important note: always check the color of your photos on the LCD after you set white balance manually.
It takes some adjustment to get the right white balance setting for the available light, and an incorrect setting is going to capture photos with color that is WAY off. For example, on some overcast days you might actually have to choose the "daylight" white balance setting instead of "overcast" if the overcast setting is messing up the colors on every photo that you take.
Request a Tip
If you're not sure how or when to use a feature on your digital camera, go ahead and ask me. I'll include the answer in a future issue of the newsletter.
Photo Fun
Instead of a learning resource this month, I thought that I'd point you in the direction of an innovative way to show off your photos.It's a web site called Animoto, and it's a unique twist on your average run-of-the-mill photo slideshow.
There's a three-step process for creating an Animoto slideshow:
- Upload some photos (or link directly to an online photo sharing site)
- Upload some music (or choose from one the tracks offered on the site)
- Click "build slideshow" and let Animoto do the rest
The end result? A photos slideshow set to music with professional transitions and animation effects - all created automatically without a ton of effort on your part.
It's free if you want to create short 30-second animated slideshows, $3 per video if you'd like something longer, or $30 per year to create an unlimited number of photographic music videos.
The best part is that friends and family will think that it took you HOURS to put together these polished videos just for their benefit.
How and When
This month we'll focus on How to Take Photos in Black and White.

Here's one of the areas where the digital medium is quite different from film: ANY photo that you take can eventually be turned into a black and white image.
It's quite easy to use photo editing software to simply remove all the color from a digital photo - voila! Black and White. But a little something gets lost during this transition, and that's why many new digital SLR cameras let you take photos in black and white (omitting the color information as the photo is captured).
If you really want to get great-looking black and white photos from your color originals, you'll have to follow a multi-step process and use some more complicated editing tools to get the look just right.
The issue here is how different color tones are mapped to different shades of gray. Since you no longer have any red, green or blue in your photo, each one of these distinct colors must be converted into different levels of gray. Each color can be converted so that it appears either as a lighter gray or a darker gray, and this mapping is what determines the look of your final black and white photo.
If you don't relish the thought of spending hours in front of your computer fiddling with gray levels, then capturing black and white images in-camera is going to be a better - and faster - way to go.
There's a huge benefit to capturing photos in black and white: it gives you immediate feedback about the composition of the image (you can review the photo on the camera's LCD).

Since there's no longer any color in your photo, creating a good composition becomes a priority. In order to have a black and white image that has impact and is interesting to look at, you've got to place the elements in your photo precisely. You also have to make sure that there is minimal clutter in your photo, because without color information elements in the foreground and background all blend together.
The good news here is that you can quickly learn what works and what doesn't by checking each image on the LCD right after you take it. If you see something that you don't like, you can make minor adjustments to the composition or camera settings until you capture a black and white image that's compelling to look at.
The easiest place to begin when it comes to black and white photography is portraits. With a portrait it's much easier to keep your composition and background simple.
If you try to take black and white photos of landscapes, you'll immediately see what happens when you remove all the color information: all of the different aspects of the landscape blend together, and it's hard to distinguish foreground from background. This is what makes black and white landscape photography so challenging.
Once you've gotten the hang of simplifying your compositions to make up for the loss of color, then you can begin to experiment with black and white filter effects.
With black and white film, the only way to create a filter effect was to screw a colored filter onto the front of your lens. But digital SLR cameras are able to mimic these filter effects digitally in-camera, so you don't have to buy any special filters to achieve them.
The four primary black and white filter colors are yellow, orange, red and green.
A yellow filter is commonly used for landscapes - it enhances the separation between white clouds and blue skies. An orange filter lightens any red tones (without making them pure white) which makes it good for concealing freckles in close-up portraits. A red filter creates very dark skies (almost black) and it will capture anything that's red in your photo as white. The green filter will lighten dark trees and bushes (for landscape photos) and also creates natural-looking skin tones (for portraits).
Some digital SLR cameras will just have one black and white mode that you can select, while others will offer the full gamut of filter effects in addition to "natural" black and white.
Cameras and Accessories
Latest Sony Digital SLR
At the time, there were a lot of press releases about how Sony wanted to become a dominant player, and how they were positioning themselves to acquire 25% of the digital SLR camera market.
Then there was a long period of silence.
Rumors abounded on the Internet that Sony was hard at work on two new digital SLR cameras that were designed to blow the competition out of the water, but for a long time that's all they were - rumors.
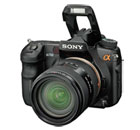
Sony has now officially announced the follow up to their first digital SLR camera (the DSLR-A100) and it's been dubbed the DSLR-A700.
The DSLR-A700 is a direct competitor to both the Canon 40D and the Nikon D300. The A700 has a 12 megapixel sensor and can take photos at 5 per second up to the capacity of the memory card. It also includes dust control, built-in image stabilization and a new 11-point autofocus system.
Canon and Nikon have been and continue to be the front-runners in the digital SLR camera market, especially when it comes to cameras in this semi-professional category, because a lot of photographers interested in cameras like these tend to have a batch of manufacturer-specific lenses already.
It will be interesting to see how well the DSLR-A700 does against its formidable competition. The camera specifications sound impressive, but only time will tell how well the camera performs.
Latest Panasonic Digital SLR
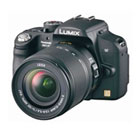
The L1 was an interesting camera in many respects. Since Panasonic partnered with Olympus on the development of their camera technology, the L1 featured the same dust control system and live view LCD that were available on the Olympus E-330.
Panasonic also partnered with Leica - a renowned optics company - on the development of the lenses for the L1. These lenses featured Panasonic's form of image stabilization, called Mega O.I.S. (Optical Image Stabilization).
While impressive on paper, the L1 did not live up to expectations, and garnered fairly lukewarm reviews. Since the L1 also came with a steep price tag (it was more expensive than either the Canon 30D or the Nikon D200, both semi-professional cameras) the buzz surrounding the camera's release quickly died down.
With the L10, it appears that Panasonic is trying to leverage a lot more functionality from their compact digital camera line, with a reduced price tag to match.
The DMC-L10 is the only digital SLR camera you can buy with an LCD screen that flips out from the camera body and twists for high and low-angle photography. The LCD also features a live view mode, which means you can use the L10 a lot like you use your compact digital camera.
In addition, the camera includes Panasonic's Face Detection technology, which helps the camera focus and set exposure when you're trying to take portraits (up to 15 faces at the same time).
The styling of the camera has been changed as well, and it now bears a great resemblance to some of Panasonic's high-end SLR-like compact cameras.
One of the big complaints people had about the L1 was its image quality. If the L10 is able to produce photos that stand up to the competition, then this camera may appeal to a wider audience of people making the jump from point-and-shoot compact to digital SLR.
Digital SLR Buyer's Guide
Thinking about buying a new digital SLR camera? Find out about the latest cameras with the Digital SLR Buyer's Guide!
Links
The following collection of links will help to keep you posted about what's new at the Guide and in the world of digital SLR cameras.
Recent Updates to the Digital SLR Guide
I'm working on a new series of head-to-head comparisons to help you evaluate all the different camera models. I'm also developing new "best digital SLR" pages for different types of consumers. None of these new pages have been completed yet, but they're right around the corner!
Other Photography Sites
- Betterphoto.com - a wealth of photography learning opportunities
- Photojojo - a great site with tons of photography do-it-yourself (DIY) projects
- Flickr - THE social media site for photographers
- Strobist - everything you ever wanted to know about lighting with external flash
- Photo.net - lots of learning resources and plenty of examples of exceptional photography
In Conclusion
A quick update on the digital SLR lessons for those of you who've registered in the past - I've just completed my re-write of lesson three. This means that the first three of the five digital SLR lessons now include more text and more photos to help you really understand how to use your SLR.Lesson four is almost done (I'm still hunting around for some photos to illustrate key points) and then I'll take a crack at lesson five after that.
Apart from the lessons, you'll be seeing a lot of new content added to the guide over the next couple of months as we all gear up for the holiday shopping season. I'll be trying to keep pace with all of the latest digital SLR camera releases and I hope to be posting more in-depth guides soon.
Thanks for reading and happy picture-taking!
--Chris Roberts, Your Digital SLR Guide