| Back to Back Issues Page | ||||||||||||||||||||||||||||||||||||||||||||||||
 |
||||||||||||||||||||||||||||||||||||||||||||||||
|
Digital SLR Guide Newsletter - Portraits, Lenses and Dust Control August 08, 2011 |
||||||||||||||||||||||||||||||||||||||||||||||||
Having trouble viewing this newsletter? Read the latest issue online at
https://www.digital-slr-guide.com/dslr-news.html or read back issues If someone you know has forwarded you this newsletter and you've enjoyed it, subscribe now to receive the next issue when it's published.
DSLR News - July 2011: Portraits, Lenses and Dust Control
In This Issue
Stay Updated!Coming Soon! New Cameras
If you're just about to make your first digital SLR purchase but don't need a camera tomorrow, then you might want to wait a month or two.
New digital SLR models almost always are announced in August and September, leading up to the busy end-of-year retail season.
Also, the current crop of cameras are getting to be about a year or two old, which often means that the manufacturer release updates.
For example, Nikon's semi-professional D300s was released in September 2009 and rumors have been swirling for some time about a D400 to replace it.
Canon's 7D was released in October 2009 and is also due for an update.
Even if you're not interested in high-end digital SLRs, it still pays to wait at least until September when most new cameras will be announced for release.
It would be a shame to pick up a new DSLR this month, only to learn that a new and improved model will be available this Fall.
How To: Keep Your Camera Clean
Even if you only take your digital SLR out once a month to take pictures in climate-controlled rooms, it's bound to get dirty at some point.
The most common issues you'll run into are:
The LCD can get smudged quite easily by your nose when you hold the viewfinder up to your eye. You also might rub your fingers across it when pressing the buttons on the back of the camera.
My lenses often get glass streaks when I'm taking pictures of children - for some reason, they feel compelled to touch the front of the lens when it's aimed at them.
Regardless of how it happens, there's a cleaning solution for streaks and smudges: a lens cloth and (if necessary) some cleaning fluid.
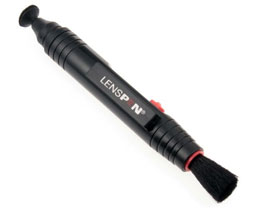 Some options here include the Nikon microfiber cleaning cloth, 3M microfiber cloth, and Zeiss pre-moistened lens wipes. Another option if you just want to clean the front of your lens is the LensPEN.
The lens cloth will do a great job on the exterior components of your camera, but what if dust should get INSIDE? If you never change lenses then this won't be a problem for you, but for those of us who like to swap lenses constantly dust can quickly contaminate the inside of the camera.
If you have a newer model with a dust control system, then my best advice is this: do nothing. Let the dust control system do what it was designed to do. If you try to clear out dust inside the camera body with an air blower, you're just increasing the likelihood that dust will land on your camera's sensor.
And what happens if dust DOES land on your camera's sensor? Well, if you have a dust control system, then it should not be an issue. Most dust control systems vibrate the sensor every time the camera is turned on (or off) to "shake" the dust off the sensor.
Other systems use magnetic fields to deflect dust so that it never comes in contact with the sensor.
Dust on the outside of the camera body and lens isn't going to cause any issues (except perhaps to make your friends wonder about your level of cleanliness). Dust and dirt on the inside of the camera body (not on the sensor) also won't have any effect on your photos.
But once dust finds its way onto your sensor, then you've got a problem. This tiny specs of dust will show up as dark black smudges in your photos, especially when you use narrow lens apertures.
Here's a quick and easy way to tell if there's dust on your camera's sensor:
This last step is essential: if you just look at the pictures on your camera's LCD screen, you're not likely to see the dust spots. You have to view an image at a large size on a computer monitor to tell if there's a dust problem.
 If you don't see any specs or smudges anywhere in your photo, then you're fine — your sensor is dust-free. However, if you see spots, speckles and squiggly lines (fine hairs or other materials) then you're going to need to get your sensor cleaned.
 This is a delicate operation. It is something that you can do yourself, but take care: if you damage the camera's sensor even slightly, then your DSLR will need to go in for repairs.
The good news is that the sensor cleaning products available are pretty easy to use and - so long as you are careful - will remove all those nasty dust specs and leave your sensor spotless. One that I have used in the past is the Sensor Swab from Photographic Solutions.
The swab comes in three different types, so just make sure that you get the right type for your camera model (not all sensors are the same size).
 Beginner Digital SLR Lessons
Lenses, Decoded
So you're interested in getting a new lens for your existing digital SLR, or perhaps your very first lens ever.
A quick browse on the internet yields for "digital slr lenses" provides you with results like the following:
Um, what?
Isn't that an awful lot of letters and numbers to describe something simple like a lens? Yes, a bit, but the good news is that each one of the letters and numbers has a purpose. Once you've decoded what each one means, you'll be able to apply the same understanding to every lens you consider.
There are three main features on any lens:
1) FOCAL LENGTH
You can determine the "zoom power" of any lens by dividing the larger focal length by the smaller one. Some examples:
2) MAXIMUM APERTURE
If you have a lens with a variable maximum aperture (quite likely, fixed max aperture lenses are rarer and more expensive) then there are TWO numbers you have to take into account: the max aperture of the lens at its wide angle focal length and one at its telephoto focal length. Maximum apertures get NARROWER the more you zoom a lens.
Let's take a look at some examples:
OK, so I snuck in a lens with a fixed (instead of variable) maximum aperture for the last example. This is just to clarify that there are a handful of lenses out there where the lens aperture doesn't change when you zoom.
3) IMAGE STABILIZATION
Image stabilization lenses used to be somewhat rare and quite expensive. All of that changed when some of the manufacturers - Pentax, Sony and Olympus - started putting stabilization systems inside their cameras.
After that, image stabilization became more common for Canon, Nikon and third party lens-makers.
Image stabilization goes by a variety of different names, but its purpose is always the same: stabilization helps you take clear shots of non-moving subjects in dim light while holding the camera in your hands.
Stabilization also helps you take clear shots when using lenses with long focal lengths (200+ mm) since these lenses magnify camera shake and can create blurry shots even when there's plenty of available light.
How can you tell if a lens has stabilization? Just look for the letters IS (Image Stabilization), VR (Vibration Reduction) or VC (Vibration Compensation) after the lens name.
IN CONCLUSION
And there you have it — the three main features of each and every lens you'll ever consider: focal length, maximum aperture and image stabilization.
Let's go back for a moment to just one of the lenses that I used above as an example and explain these again one last time.
The lens we'll use is the Nikon 18-200mm f/3.5-5.6G AF-S ED VR II.
 Intermediate Digital SLR Lessons
Portrait Tips
If you've got a passion for portraits, here are a few things you should consider before you start rounding up subjects.
Who Do You Want to Photograph?
Many professional photographers excel at what they do because they are specialists, not generalists. When you're just getting started in portrait photography, you have to narrow your range even further.
The first thing to decide is what types of people would you like to take portraits of? Children? Young Adults? Adults? The elderly?
 There are two reasons to decide this up front:
#1 — It will determine how you interact with your subjects
Child photography requires a great deal of energy and enthusiasm and you can't be afraid to act silly to get a smile or a reaction. You also have to be prepare to MOVE your body and camera constantly to get into position for a good shot.
Adults are more cooperative than kids, but they're also a lot more uncomfortable and clam up in front of a camera. You have to find ways to get adults to relax and act natural — conversing as you take photos helps. It also helps to take a bunch of shots that "don't count" to get people used to the idea of being photographed.
After the 50th image, even the tensest people start to loosen up.
#2 — it will determine the "look" of your images
If you try to cover a HUGE range of portrait photography subjects right at the beginning, you'll never get the opportunity to develop a unique style or "look" to your photos.
However, if you focus instead on one small part of portrait photography you can develop style that creates images that are all your own.
Pick one niche and cover it until you'll can't stand it anymore. Then, branch out to others.
What Gear Do You Need?
Any digital SLR camera will take portraits since portrait photography does not require a massively advanced camera.
The key to getting good portraits is to pick the right LENS.
If you want to take a portrait where the background is just as important as your subject, then use a wide angle lens (18 to 35mm) and a narrow aperture (f/8 to f/11) to ensure that both subject and background are nice and sharp.
However, if you want to focus on a person's face and don't want the background to compete, then you need to use a telephoto lens (70 to 300mm) and a wider aperture (f/4 to f/5.6). This will throw the background out of focus and will make your portrait subject stand out.
What Settings Should You Use?
Here are the basic settings that I use for portrait photography:
In last month's newsletter, I talked a LOT about the relationship between lens aperture, ISO setting and shutter speed so I won't cover that here.
When it comes to the "right" shutter speed, this depends on the subject of your portrait.
If you're taking photos of kids and babies, then you need to use a faster shutter speed (between 1/250 and 1/500) since neither is willing to sit still for a portrait.
However, if you're taking pictures of an adult who can follow directions and sit still then shutter speeds between 1/60 and 1/125 are fine.
Use ISO to increase your shutter speed, especially if you are taking pictures indoors.
Need a good source of light when indoors? Place your subject right next to a window - the soft light that comes through is ideal for portraits (which has earned it the name "window light").
 When and Where?
Try not to take portrait photos in direct sunlight at high noon — there is NOTHING flattering about this type of direct overhead light. Only supermodels and movie stars will look OK.
The best outdoor portrait light is on days that are slightly overcast. The thin screen of clouds between the sun and the ground creates a soft light (like window light) that makes portrait subjects look great.
If you don't have any choice about the DAY you take portraits, then pick the TIME.
Portraits come alive in the late afternoon, right before sunset. Early morning also works, although the light lacks the warmth that it has later on in the day.
And finally — if you cannot control either the day or the time of your portraits, move your subjects into the SHADE. Look for a continuous source of shade, not the speckled kind produced when you stand underneath a tree.
Shade provides the same sort of soft light that you'd get by putting someone next to a window.
Photo Links
Photo Contests
Other Photography Sites
Great Photo Blogs
In Conclusion
The newsletter is a bit late this time thanks in part to my hectic schedule.
I'm hoping to get back on track in the month of August so that I can start preparing for the - typically - busy pre-holiday season when all the new cameras are announced.
Keep an eye out for new camera announcements both in this newsletter and on the Digital SLR Guide's Facebook page.
Until next month, happy picture-taking!
--Chris Roberts, Your Digital SLR Guide
|
||||||||||||||||||||||||||||||||||||||||||||||||
| Back to Back Issues Page |
