February 28, 2011
Having trouble viewing this newsletter? Read the latest issue online at
https://www.digital-slr-guide.com/dslr-news.html or read back issues
If someone you know has forwarded you this newsletter and you've enjoyed it, subscribe now to receive the next issue when it's published.
DSLR News - February 2011The best photograph isn't one that's technically perfect or so pleasing to the eye that it deserves to be framed and mounted on the wall.No, the best photo is the one that you can find two years from now when someone says: "Remember that great trip we took back in..." 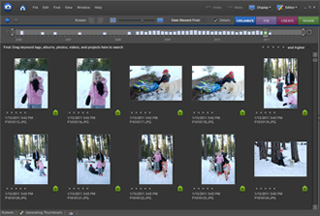 I've been taking digital pictures for almost a decade now so I've got a large archive of images spanning a lot of personal history. Aside from all the other benefits of digital photography, the one that I'm most happy about is the fact that every photo you take with a digital camera is stamped with the precise date and time that you took it. With the proper level of organization (and maybe some software) you can catalogue a decade's worth of images so that you can find specific ones when a particular memory leaps into your head. Everyone has their own system for keeping digital images stored on a hard drive - here's mine. I create folders for each year. Within the year folder I create 12 folders, one for each month. Within each one of those folders is a folder for the day the images were taken, although I also include the year and month again as part of the name. For example, the folder of images from March 15, 2004 would have this name: 2004-03-15 (I've found that it's easier to put the year and month first and the day last for sorting purposes). Now, I can't always remember exactly when certain events have taken place but at least I can typically remember the year and month - that often gets me close enough. Even with a diligent folder naming system, it still helps if you have a program that will organize the photos in chronological order and provide you with thumbnail images so you can browse through your historical archive. The program that I use to do this is Adobe Elements - it has an "Organize" feature that does just this. By looking through my image gallery, I can go back to any moment in time to recall what was happening then. If I want to find a specific photo to copy or email to someone else, I just have to see the date it was taken on and - within minutes - I can find the folder that it's stored in. This system works quite well - provided the hard drive you're using doesn't fail (this happens more often than you'd expect). If you want to preserve your hundreds/thousands of images taken over the years you MUST MUST MUST have some type of backup system. And, as luck would have it, that's exactly what I'll talk about next. |
In This Issue
Latest SLR Guides
Canon Rebel T1i
Nikon D5000
Nikon D90
Nikon D60
Canon Rebel XSi
Pentax K20D
Canon 40D
Olympus E-510
Nikon D80
Canon Rebel xTi
Nikon D40
Digital SLR Terms
Megapixels
Stabilization
ISO / Image Noise
Sensor Dust
Crop Factor
RAW vs. JPG
Continuous Photos
Autofocus Points
Aspect Ratio
Lens Terms
Focal Length
Prime vs. Zoom
Maximum Aperture
First vs. Third Party
SLR Lens Features
Canon Lens Glossary
Nikon Lens Glossary
|
Stay Updated!
The Digital SLR Guide is now on Facebook. If you're on Facebook, drop on by to get frequent updates about new digital SLR cameras and photo techniques.Backup Options: Keeping Photos Safe
You are one of those people who has been diligently copying photos from your memory cards to your computer hard drive for years.You put your images into folder, you catalog them and you can refer to them at any time. But if that solitary hard drive should fail - and they most certainly do (often due to sudden power outages) - all those images and memories will be suddenly lost.
Luckily, there are many ways that you can prevent such a thing from happening. Some are quite simple and relatively inexpensive while others require more tech savvy and more financial investment.
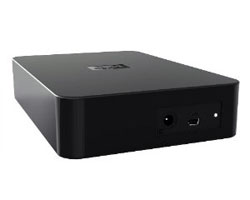
OPTION #1 - Get an Extra External Hard Drive
This first option is by far the easiest for the average individual who wants a simple backup solution.
All you have to do is plug the external hard drive into your computer (typically via a USB port) and then turn on the power for the drive. Your computer will recognize the drive and then you can just copy every single file and folder from your main drive to the backup.
What capacity drive do you need? The answer to this question depends on whether or not you're shooting Full HD 1080p video clips in addition to taking stills. If you're just capturing still images, then a 500GB drive drive should work just fine.
However, if you also want to put HD videos onto the backup drive, then it might be better to start out with a TeraByte (1TB) - about double the storage space of the 500GB.
I personally like and use Western Digital drives but there are plenty of options out there to choose from when it comes to external hard drives.
The primary benefit of having a second drive like this is that if your primary drive ever fails, you can rest easy knowing your precious memories are safe on the second drive.
The main drawback to this approach is remembering to copy files to the backup drive when you add new ones to your primary hard drive. This issue is solved by option #2.
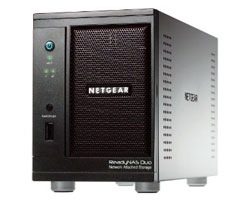
OPTION #2 - Get a Network Storage Device
Even though it has a relatively techy-sounding name, an Networked Access Storage Device (or NAS) is really just a second hard drive.
Actually, it's TWO hard drives set up in a way so that any time you add a file to one of the drives, it is instantly copied over to the second drive. This setup ensures that all the data on one of the drives in the NAS is identical to the data on the other - and you don't ever have to remember to copy files!
Another benefit of a NAS is that - rather than being connected directly to your computer - it is connected to your home network.
This is why setting up a NAS requires a bit more tech know-how than just using an external hard drive. You have to have a home network in the first place, which means you have more than one computer using the same Internet connection using a device called a router.
If you have a router, then adding a NAS device to your network is fairly straightforward. Once connected, the NAS is recognized by any computer connected to the network. The nice part about this is that it makes your photos accessible from any computer in your house.
If you also happen to have a networked device connected to your television, then you can also display any photo stored on the NAS on your TV.
With a NAS, you once again can select the volume of storage space that you use: 500GB, 1TB or even 2TB. Just remember, for complete redundancy you actually need TWO such drives - picking a drive with too much storage can drive up the prices of this backup solution quite a bit.
The NAS that I use is a Netgear ReadyNAS and I have found it to be easy to use and quite reliable. A recent power outage at my home permanently damaged one of the drives in the NAS and all I had to do was replace the busted drive with a new one - I didn't lose a single photo in the process.
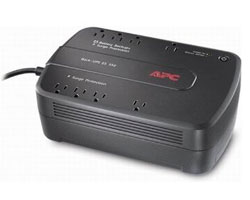
Since power outages can cause damage to both hard drives as well as the hardware inside a NAS, I'd recommend that you also get an Uninterruptible Power Supply (UPS). The reason is simple: unlike your computer which you can turn on and off as needed, a NAS device typically runs all the time.
Sudden power outages may not harm your computer if it is turned off, but they can cause harm to the NAS, even if the NAS is plugged in to a surge protector (mine was). A UPS is not only a surge protector, it also has a backup battery. Should the power suddenly shut off, you can adjust settings on the NAS so that it takes time to shut down properly (while running on the battery power) which will help guard against drive failure.
OPTION #3 - Use an Online Backup System
While the backups I've described above will protect your photos in the event of a hard drive failure, they won't help all that much if your entire computer system is damaged (fire, flood, etc.).
For this, the only solution is to get your files into a storage location that is nowhere near your home.
One way to do this is to get an external hard drive - like option #1 - and copy data to it. Once the backup drive has data you can store it outside of your home. The problem - once again - is keeping the backup current with your main hard drive.
Another solution is to use an online backup company.
Here's how this works - using a control panel on your computer, you specify which files and folders you'd like to have backed up. On a periodic schedule (which you can also define) your files are uploaded to the company's servers.
All of this happens in the background, so long as your computer is turned on. Once the files have been backed up, you are notified.
The real benefit of such a backup strategy is that you really don't have to pay a lot of attention for it to work and setup is a real breeze for the technically challenged. Just tell the company what folders to backup, and off it goes.
The main drawback is that every file you want to back up needs to get uploaded to the backup company's servers. Depending on the speed of your Internet connection, backing up even a hundred photos could take HOURS - not to mention how much this will monopolize your connection while the backup is in progress.
If you have a super-fast connection then this is less of an issue.
The online backup service that I use is called mozyhome, and it's relatively inexpensive given the information it is keeping safe.
New Cameras: Two Canon Rebels
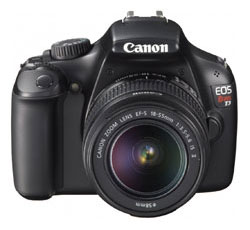
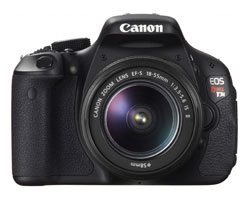
Canon recently announced the release of not one, but two new Canon Digital Rebels.The new Canon T3 1100D and the Canon T3i 600D will both be available in March of 2011.
The T3 1100D is the more basic of the two cameras, so I'll talk about that one first. The T3 is designed with the entry-level DSLR photographer in mind. Its feature set is simple, so it has a limited number of "special" options that you can customize.
The T3 has a 12.2 megapixel sensor, a continuous speed of 3 photos per second, 9 autofocus points, a 3 inch fixed LCD, an ISO range from 100 to 6400 and a basic High Definition 720p movie mode. It stores its image and video files on SD, SDHC or the new SDXC memory cards.
While its not the fastest nor the most robust camera you can get, it's also one of the least expensive: the Canon T3 1100D will retail with a lens for about $600 USD.
By contrast, the Rebel T3i 600D is packed with features and therefore comes with a higher price tag.
The basic specs on the T3i go like this: 18 megapixels sensor, 3.7 continuous photos per second, 9 autofocus points, ISO from 100 to 12800 and a Full HD 1080p movie mode with manual exposure and audio level controls.
In addition, the T3i is the first Digital Rebel to sport a flexible 3 inch LCD screen that flips out from the camera body and rotates. This is the same LCD that you'll find on the semi-professional Canon 60D.
Even though it is geared toward photographers with more experience, the T3i includes a lot of modes to help out beginners including the EOS Feature Guide, Basic + Function and a "Scene Intelligent" AUTO mode.
The Feature Guide introduces you to different camera settings like aperture and shutter speed and explains their use. The Basic + mode provides a small measure of manual control when using the Scene Modes (Portrait, Landscape, Closeup, etc.). Scene Intelligent Auto tried to determine your subject matter and will adjust camera settings for maximum image quality.
The extra features come with an increase in price: the T3i kit price is $900 USD with an 18-55mm lens or $800 USD for the camera body alone.
Beginner Tip: When to Use Depth of Field
In last month's issue of the newsletter, I introduced you to the concept of Depth of Field.In its simplest incarnation, Depth of Field is what makes your background either look blurry or clear when you're focusing on a subject in the foreground. A shallow Depth of Field results in a blurry background, while deep Depth of Field makes everything in your image clear.
There are three main ways you control the level of Depth of Field: camera to subject distance, lens focal length and lens aperture.
In this month's tip, we're going to focus less on the technical aspects of Depth of Field and more on the aesthetics. Put another way, hopefully this will answer the question "why should I care about Depth of Field at all?"
The level of Depth of Field is evident in every photo you take, whether you actively notice it or not.
If you've only ever used the AUTO mode on your camera, you may not have see a ton of variation in the Depth of Field. This is because when your camera is left to its own devices, it tries to get as much Depth of Field in every shot as it can. But infinite Depth of Field may not always be the look that you are going for.
The main reason to create a shallow Depth of Field is to isolate your subject from the background. Anyone looking at an image with shallow Depth of Field should have no doubt about the primary subject of the photo.

Shallow Depth of Field is most often used for portrait images and you can use it for a variety of reasons:
- The background is cluttered and you don't want to draw attention to it
- The background is plain but has no real aesthetic value
- You want your subject to really stand out
These same principles apply even if you're not photographing human portrait subjects - shallow Depth of Field works equally well for wildlife, insect and nature shots.
So what about the opposite - extreme Depth of Field?
This is most commonly used for landscape and architecture photography. Since there is no distinct subject in the foreground, you want your entire image - edge to edge - to be in sharp focus. This will bring the viewer "into" your photo and will make them feel like they were standing there when you took the shot.
There will be many times where you will go against these guidelines to achieve a certain look.
For example, let's say your taking a portrait photograph where the background is essential to convey a sense of place. In this case, you want to ensure that there is plenty of depth of field so that both the portrait subject AND the background are in focus.

You'll see this technique used a lot in travel magazines, when the background is sometimes just as important as the primary subject.
Now imagine that you're taking a landscape image of a large rock on the shore of a serene mountain lake. In this case, you can make the rock stand out a bit from its surroundings by creating a shallow depth of field. Adding just a slight bit of blur to the background will make the rock the focal point of the image, rather than the entire landscape.
I've provided a variety of examples to help explain when you might want to use shallow vs. extreme Depth of Field.
The information that I've provided above can best be summarized like this:
- If the photo you're taking has a primary subject that is not the ENTIRE scene, use shallow Depth of Field to isolate the subject and make it stand out from the background and foreground.
- If the subject of the photo you're taking IS the entire scene, use extreme Depth of Field to ensure that the entire image appears in focus and sharp.
Beginner Digital SLR Lessons
- Dramatically improve the photos you take
- Take manual control of aperture, shutters speed and ISO
- Get exposure right, even in challenging light
- Learn at your own pace
- Download lessons as PDF files
- Ask me questions
Intermediate Tip: Isolating Subjects With Flash
I often try to provide tips that don't require any special additional gear, but that's not the case this month.In order to get the most from this tip, you're going to need an external flash unit for your camera and the ability to get it off your camera. There are two main ways you can achieve this:
- Use a flash extension cord — one end of the cord attaches to your camera's hot shoe, the other to the flash
- Trigger your flash wirelessly
The second option is the better of the two if you want to be able to position your flash anywhere without getting tangled up in a bunch of extension cords. Extension cords also limit the distance the flash can get from the camera.
If you have a newer DSLR camera (one released in 2010) it's possible - depending on the model - that your camera's built-in flash can trigger a remote external flash. This functionality is becoming more common, but is not a feature on most cameras made prior to 2010.
With the gear talk out of the way, I'm going to dive in to an explanation of how you can isolate a subject from the background using flash.
This technique can be used under a variety of circumstances:
- The background is cluttered and you don't want it showing up in your photo
- You are using a black background and you want it to appear as a "pure" black instead of gray

Here's how you do it:
- Set Your Flash to Manual Mode — most external flash units (except for the most basic ones) provide the option to set the flash power manually. This is key, because you want your flash to put out the same amount of light from shot to shot. If you use your flash in AUTO mode (also called TTL) it will adjust its power on the fly and put out different quantities of light. Once you've set your flash to manual mode, pick half power as a starting point.
- Set Your Camera to Manual — putting your camera in manual mode will let you brighten or darken the background according to the settings you choose. Even the semi-automatic modes like Shutter Priority and Aperture Priority will cause unexpected results when you're using a flash. To start out, pick a moderate shutter speed (between 1/60 and 1/250) and a moderate aperture (between f/5.6 and f/8).
- Take a Test Without Flash — take a photo using the manual settings you've selected with the flash turned off. This test shows shows you just how dark your background will look in the final image. If the entire image is pure black, then once you turn on the flash only the subjects that are lit will be visible. If you don't want the entire background to be pure black, slow down your shutter speed and/or widen your aperture to brighten the image.
- Turn on the Flash — now that you have the exposure for the background the way you want it, turn on the flash and point it at your primary subject. You may have to play around with the angle of the flash relative to your subject in order to prevent the flash from lighting BOTH the subject AND the background. This often means that you have to position the light to one side of the subject or the other, rather than placing the light directly in front of the subject.
- Adjust Flash Power — you may find that the subject lit by flash is over or under-exposed. Since you don't want to fiddle with your camera settings (changing shutter speed or aperture will affect the exposure of the background) your only options are to change the power level of the flash (increase it to brighten the subject and decrease it to darken the subject) or to change the position of the flash (move it closer to brighten the subject and farther away to darken the subject).
- Check Exposure — the best way to tell that you've got your subject properly exposed is to keep taking test shots as you adjust your flash. Keep checking the image on your camera's LCD until it looks good. If your camera can display a histogram, this will also help you determine if the exposure is correct.

In case it's not obvious from the above steps, this technique really works best on subjects that can stay still for a minute or two.
If your subject moves substantially while you're getting the correct exposure dialed in, you have to re-calibrate your settings for the new subject position. This means that you have to adjust flash power, adjust the flash-to-subject distance, modify your camera settings (either shutter speed or aperture) or some combination of ALL of them.
Doing such things on the fly requires quite a bit of practice with the equipment that you're using to be able to manually adjust these different options on the move.
Before you gain such familiarity, it's best to practice on subjects willing to stay in one spot while you take time to learn.
Intermediate Digital SLR Lessons: Playing With Light
- What types of light are best for photography
- How to see and manipulate natural light
- What all the settings on your flash mean
- How to improve the quality of light from flash
- When to blend natural light with flash
- How to use off-camera flash
Photo Links
Photo Contests
Other Photography Sites
- Mirrorless DSLR Guide - learn about mirrorless cameras from Panasonic, Olympus, Samsung and Sony
- Betterphoto - a wealth of photography learning opportunities
- Flickr - share your photos with friends and others
- Photo.net - plenty of learning resources and examples of exceptional photography
- Borrowlenses - rent lenses to use on your digital SLR before you spend tons of money on one
- Photojojo - tons of photography do-it-yourself (DIY) projects
- Viewpoints.com - read product reviews from other consumers like yourself
Great Photo Blogs
- Digital Photography School - hundreds of photo tips and techniques
- Strobist - everything you ever wanted to know about lighting with external flash
- Joe McNally - get the "behind-the-scenes" thought process from a professional photographer
Recommended Digital SLR Retailers
(These are the three online stores that I use to purchase all of my digital SLR photography gear)In Conclusion
That's all for this month.With the announcement of the new Canon T3 1100D and the T3i 600D I expect that there will soon be news of new cameras from Nikon, Olympus, Pentax and Sony.
Where one company goes, the others soon follow. This is especially true of Nikon, a company that likes to compete with Canon camera for camera.
The Nikon D5000 is getting old by DSLR standards and is due for an update.
We'll see what the manufacturers are able to release before the summer months when a lot of people start thinking about getting new cameras to carry along on vacation.
Until next month, happy picture-taking!
--Chris Roberts, Your Digital SLR Guide

