| Back to Back Issues Page | ||
 |
||
|
Digital SLR Guide Newsletter - Camera Care in the Cold April 03, 2011 |
||
Having trouble viewing this newsletter? Read the latest issue online at If someone you know has forwarded you this newsletter and you've enjoyed it, subscribe now to receive the next issue when it's published.
Stay Updated!Backup Options: Keeping Photos Safe (Updated)In last month's newsletter, I talked about a variety of ways you can backup your precious photos to keep them safe from all manner of disaster (namely, hard drive failure).I discussed the use of an external hard drive, a networked attached storage device (NAS) or an online backup service. A few readers wrote in and pointed out some additional backup options that are worthy of note. If you are using a Windows PC with the Windows 7 operating system, then you don't have to manually copy files if you have an external hard drive. Instead, just configure the Backup and Restore setting to automatically backup important files, or any files or folders that you select. The backups can be scheduled to run at the interval of your choosing (nightly, weekly, etc.). A second option is backup software called SyncBack, created by 2BrightSparks. There is a free version, with only the basics and two paid options: SyncBackSE and SyncBackPro. In addition to backing up your important data to other locations (external hard drive, NAS, etc.) SyncBack can keep files on multiple computers synchronized. This is helpful if you have both a desktop and a laptop and would like to ensure that any file you've got on one is also on the other. Regardless of the option you choose, the important thing is that you pick ONE and make regular backups a standard part of your computer use. That way when your hard drive fails or a lightning storms shorts out your entire computer, you can rest easy knowing that your precious photos are still safe. New Cameras: Two Sony DSLRsLast month, I provided some more information about two new Canon DSLRs: the Rebel T3i 600D and the Rebel T3 1100D.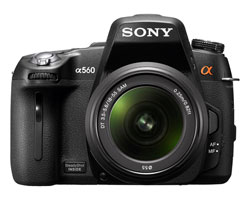 This month I'll introduce you to two new cameras from Sony: the A560 and the A580. This introduction is made easier by the fact that these two cameras are virtually identical. They share all of their features except one: the number of megapixels. Let's talk more about what these cameras have to offer, and then I'll explain the difference between them. LIVE VIEW All DSLRs released recently have live view systems which let you compose pictures using the camera's large LCD screen in addition to the viewfinder. The drawback to this system is that autofocus in live view mode is SLOW — about the same speed as the autofocus in a compact camera (and sometimes even a bit slower). Not so with the Sony A560 and A580: both of these cameras can focus quickly in live view mode, and they can leverage the full power of their 15-point autofocus systems when you compose photos using the viewfinder. FLEXIBLE LCD Both cameras feature a 3 inch LCD screen that flips out from the camera body so that you can see it with the camera high above your head or at waist-level. While useful for taking pictures in unique circumstances (over a crowd of people, at the eye level of a small child, etc.) flexible LCDs really make sense when you're shooting video. When you shoot video with a DSLR you must use the LCD to frame your movie - the viewfinder will be blacked out. If you want to shoot video without always holding the camera up in front of your face, having a flexible LCD is a real advantage. 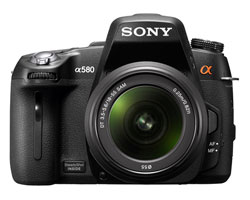 INSTANT PANORAMAS If you want to create a panoramic image with a regular DSLR, you have to take multiple consecutive photos as you move the camera across the landscape. Later, you have to use special software to "stitch" these multiple images together into a single super-wide photo. The Sony A560 and A580 do this automatically, no software or computer required. Called "sweep panorama" you just press and hold the shutter release as you pan the camera across a scene. The camera then assembles the images that it captures for you into a single panoramic image. OTHER FEATURES In addition to their fast autofocus systems, flexible LCD screens and sweep panorama modes, the Sony A560 and A580 also have other features that make them competitive with models from other manufacturers. They are compatible with SD, SDHC and SDXC memory cards, have ISO ranges from 100 to 25600, can rip through consecutive photos as a rate of 7 per second and include Full HD 1080i movie modes. THE DIFFERENCE So, what's the big difference between these two cameras? The answer is pretty simple: two megapixels and $150 USD.
Beginner Tip: Creating BlurI spend quite a bit of time answering questions and writing newsletter articles about how you PREVENT blur in your digital photos.This makes sense, since any type of blur in a digital photo is often viewed as some kind of mistake: you've got perfect light and your portrait subject has a great smile, but her entire face is just slightly fuzzy. This is probably NOT what you intended when you took the photo. One way to prevent blur is to learn all about why it happens and what you can do to avoid it. Another way is to intentionally create blur in your photos. By experimenting with blur, you'll discover the settings that cause it and - conversely - might gain some insight about how to prevent it. The good news is that creating blur is quite simple in all kinds of light except one: direct sunlight. The problem with direct sunlight is that your camera's shutter won't want to stay open for a very long time - and this is the KEY component when you create blur. Put another way: slow shutter speeds result in blurry photos. Here's how to see the effect of this yourself:
The level of blur you see in your photos depends a lot on the speed of the subject you're photographing.  For example, if you're taking pictures of a non-moving subject, you will see SOME blur at 1/5th of a second, but that blur will be much more obvious if you're trying to capture a subject in motion. As you continue to take pictures, gradually increase the shutter speed (1/10, 1/30, 1/60th of a second, etc.). Non-moving subjects should appear nice and sharp right around 1/60th of a second (or sooner if you have some type of image stabilization). Moving subjects will require faster shutter speeds to freeze in place.  Beginner Digital SLR Lessons
Intermediate Tip: Freezing Subjects With FlashSince the beginner photographic tip was about shutter speed, I figured I'd carry that same concept through to this tip, with a twist.The beginner tip describes how you can intentionally create motion blur in your images. This tip will describe how you can capture a blurry AND sharp image at the same time. You do it with the help of your flash. First, get some motion blur:
Take a few shots without your flash to see the results you're getting. If you're taking pictures of a subject in moderate motion, then you should be seeing some obvious motion blur in your images. Now, activate your flash. The flash can either be the built-in one or an external flash unit. Leaving your flash in automatic (TTL) mode, take some more shots with the exact same shutter speed and aperture you previously selected manually. You should see an interesting effect: a lot of the image will be blurry (especially your subject) but the part of the photo illuminated by flash will be quite clear. Capturing an image that you really like will take some practice and experimentation. Probably the most difficult thing to get right is the focus. Since you are working in low available light, your camera's autofocus system will have a harder time locking onto your subject, especially if your subject is moving about. Just keep taking shots until you get one that turns out. You can also modify the shutter speed to create different blur effects. For the purpose of this exercise, changing the aperture won't have any impact on the amount of motion blur. Intermediate Digital SLR Lessons: Playing With Light Learn all about light in this new series of lessons from the Digital SLR Guide. These lessons explain:
Photo LinksPhoto ContestsOther Photography Sites
Great Photo Blogs
Recommended Digital SLR Retailers(These are the three online stores that I use to purchase all of my digital SLR photography gear)In ConclusionI turn the remainder of this newsletter of to you, dear readers.Sort of. There are a ton of relatively new digital SLR cameras that I have not yet had the opportunity to review. I was so busy last year just updating the web site and keeping the content fresh that I really didn't have the time to use and review cameras. Now that the majority of the site is up-to-date (yes, there are some notable exceptions that I'm still working on) I have time once again to play around with some cameras and describe my experience. The question that arises is this: which one? Instead of random guesswork or picking the model that I'm most interested in, I figured I'd leave it up to the readership of this newsletter and the web site to decide for me. If there is a specific camera that you have been dying to learn more about, just take 10 seconds out of your day to vote for the next digital SLR guide. Once I can tell which camera is winning the popularity contest, I'll make it a priority to get it reviewed and will announce when that review is available in a future issue of this newsletter. Until then, happy picture-taking! --Chris Roberts, Your Digital SLR Guide |
||
| Back to Back Issues Page |