Nikon D5000 Guide
|
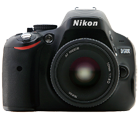
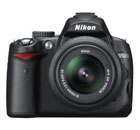
In order to write this Nikon D5000 Guide, I had to blend two other previous guides together: my Nikon D60 Guide and the Nikon D90 Guide. And that's because this is what the D5000 is: a blend. It borrows its features from both the D60 or the D90 and throws in one of its own: a flip and twist LCD (more on this in a moment). The other noteworthy feature on the D5000 is the video capture mode, making it the second Nikon digital SLR that has it (the D90 was the first). Perhaps best of all, Nikon dramatically dropped the price on the D5000 - while it's not quite as affordable as a D60, it's not nearly as expensive as a D90. This puts some of the advanced features that the D90 has to offer - video mode, 11-point autofocus, fast continuous shot rate - into the hands of photographers on a budget. What's impressive is that all this functionality comes packaged in a camera that's both small and light, making this camera much more portable than the larger D90. Sure - if you attach a massive lens it's going take up a bit of space - but if you stick with the standard 18-55mm kit lens you can haul along the D5000 with you wherever you go. Let's kick off this Nikon D5000 guide with a quick overview of this camera's main features. |
 |
 |
Quick Overview
- 12.3 megapixels
- Compatible with Nikon AF-S and AF-I lenses
- 4 photos per second
- ISO settings from 100 to 6400
- Maximum shutter speed of 1/4000th of a second
- 1.6 times crop factor
- Stores photos on SD memory cards
- 11-point autofocus system
- Dust control system
- 2.7 inch live view flip and twist LCD
- Extra dynamic range
- Digital movie mode
Key Feature
The key feature on the D5000 is readily apparent the moment you see the camera:
The LCD screen flips out from the camera body and pivots by 180°.
When paired with the live view mode, this flexible LCD provides a lot of versatility:
- You can easily compose shots with the camera held high above your head (angle the LCD down)
- You can compose photos when shooting from the hip - so you don't draw attention to yourself (angle the LCD up)
- You can compose photos from ground level
- Taking self portraits is a snap (flip the LCD town and turn it all the way around)
- The LCD screen is very well protected when not in use (face it in toward the camera body)
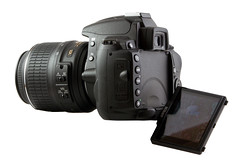
For creative types, this LCD lets you take pictures from uncommon viewpoints (i.e. bug's eye view, bird's eye view).
It's especially useful when you're capturing videos - you can hold the camera at any angle and still frame the movie just the way you want.
Most of the video that I shot of my two kids was done with the camera held at waist level - this kept the camera at their eye level and made for a better composition.
To sum up: the flip and twist (or articulated) LCD on the Nikon D5000 provides you with significantly more options when it comes to composing your still images and videos. This lets you be more creative about the shots you take since you don't always have to hold the camera at your eye level.
Who The Nikon D5000 is For

In a word: parents.
I'll admit that I'm biased in this regard since I am a parent and I primarily used the camera to take pictures of my kids.
Clearly - even if you're not a parent - the D5000 has a lot of features that will satisfy your needs.
But here's what makes the D5000 ideally suited for anyone with children (or grandchildren) looking to capture important family moments:
- Easy to Use - unlike the more complicated Nikon D90, the D5000 is a breeze to use and offers a helpful LCD display that illustrates photo terms for novice photographers
- Video Mode - some things kids do is better caught on video than with stills, and with the D5000 you can do both
- Articulated LCD - you can hold the camera down at kid level and still see how your composition will turn out
- Compact and Light - the D5000 won't weigh you down when you go on short day trips or long family vacations
- Fast Autofocus - the 11-point autofocus helps you zero in on subjects who refuse to stay still (sound familiar?)
So it's not just one feature alone that makes the D5000 suitable for child photography - it's the variety of options that the camera offers.
Plus, the D5000 is reasonably priced — great for parents who are saving every last penny for the college fund.
In Comparison
Nikon D5000 vs. D60 vs. D90
At the beginning of this Nikon D5000 guide, I mentioned that this camera is a hybrid, falling right between the D60 and the D90 in terms of feature and price.
Since that's the case, it only seems fair to compare the D5000 to both of these other cameras at once.
I've sandwiched the D5000 in between the D60 (a lesser model) and the D90 (a more advanced model) so you can see what some of the differences are.
| D60 | D5000 | D90 | |
|---|---|---|---|
| Release Date | August 2006 | April 2009 | September 2008 |
| Megapixels | 10.2 | 12.3 | 12.3 |
| Continuous Speed | 3fps | 4fps | 4.5fps |
| Autofocus Points | 3 | 11 | 11 |
| ISO Range | 100 - 1600 | 100 - 3200 | 100 - 6400 |
| LCD Size | 2.5 in. | 2.7 in. | 3.0 in. |
| Live View | |||
| Articulated LCD | |||
| Dust Control | |||
| Image Stabilization | |||
| Dynamic Range Control | |||
| Movie Mode | |||
| Dimensions | 5.0x3.7x2.5in 94x64126xmm | 5.0x4.1x3.1in 127x104x80mm | 5.2x4.1x3.0in 132x104x76mm |
| Weight | 18oz (522g) | 19oz (611g) | 22oz (703g) |
First, let's talk about what the D60 lacks relative to the D5000: no live view LCD, no articulated LCD and no movie mode.
Furthermore, the D60 has less autofocus points and a slower continuous shot rate (3 photos per second vs. 4) than the D5000.
While this seems to make it clear that the D5000 is a superior camera, realize that much of the advantage of the D5000 revolves around live view - which doesn't perform very fast.
I'll go into more detail about the live view mode later in this guide - here I will just note that you should understand some of the limitations of live view before you decide on the D5000 over the D60.
Bottom Line: if you want a camera with live view, and enjoy taking photos from odd angles, the D5000 is the clear choice.
Now let's move on to the D90.
The D90 is larger, heavier, and designed for more semi-professional use. It includes many features and custom settings that can be leveraged by experienced photographers but that won't be touched by people just getting their first digital SLR.
In many ways the D90 is identical to the D5000 - except that it lacks the articulated LCD screen.
But there is one notable difference: the D90 has a built-in focus motor while the D5000 does not. This means that lenses that don't have their OWN focus motors (including many older Nikon and third party lenses) won't autofocus when used with the D5000 (but they'll work fine on the D90).
Since the D5000's autofocus only works with lenses that have their own motors (labeled AF-S or AF-I), this limits the number of lenses you can use with this camera, unless you prefer using manual focus.
Bottom Line: if you want a camera that's compatible with old Nikon lenses, the D90 is better than the D5000.
Nikon D5000 vs. Other Manufacturers
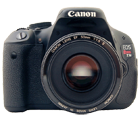
The cameras competing with the Nikon D5000 (as of June 2009) include the Canon Rebel T1i (500D) and the Pentax K-7.
Let's examine the advantages and disadvantages of these cameras relative to the D5000:
| CAMERA | ADVANTAGE | DISADVANTAGE |
|---|---|---|
| Canon Rebel T1i (500D) | Higher megapixel count (15 vs. 12) and higher resolution video mode (1080p vs. 720p). Compatible with all Canon EOS lenses. | No articulated LCD. |
| Pentax K-7 | The built-in image stabilization in the K-7 works with any Pentax lens you attach to the camera. | No articulated LCD. |
When it comes down to a direct comparison with other manufacturers, the clear advantage of the D5000 is its articulated LCD.
However, this is really only an advantage to photographers who delight in snapping photos from odd angles.
It should also be noted that photographers have been capturing amazing images for years WITHOUT articulated LCDs - so having one won't necessarily make your pictures that much better.
The Canon T1i 500D does have a slightly higher megapixel count (for larger prints) and a higher resolution video mode - which will make videos look better on high-definition widescreen TVs but will also take up that much more space on your memory cards and hard drive.
The main advantage of the Pentax K-7 is that its image stabilization is BUILT IN to the camera body - which means it works with any Pentax lens you attach. With both Canon and Nikon, you'll only get image stabilization by purchasing special lenses that include it.
The Pentax has the same number of autofocus points as the D5000 (11) but can take consecutive photos faster: 5.2 per second vs. 4 per second with the D5000.
If you own any old Pentax film SLR lenses, they will be compatible with the new K-7 while older Nikon lenses will be manual focus only on the D5000.
Bottom Line: if an articulated LCD is important to you, then the D5000 is the only choice. If you take photos from normal angles, then both the Canon T1i (500D) and the Pentax K-7 are great alternatives.
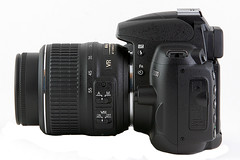
How It Works
In Use
The grip on the D5000 is equivalent to any other small sized digital SLR - it's not great if you have large hands or long fingers.
However, the small size and low weight is also one of the benefits of a camera like this one.
The D5000 is quite easy to carry around at all times and fits comfortably into a small bag (good if you don't want to draw attention to yourself and your camera).
If you have the kit lens attached - or a similar low-weight lens - the camera is easy to hold in one hand, which is a good thing if you often use the live view mode with the camera held away from your body.
One fantastic accessory for a camera like this is a wrist grip strap.
Wrist grip straps are inexpensive, and they include one piece that screws into the camera's tripod socket and a strap that fits snugly around the outside of your hand when holding the camera.
This provides you with a much more comfortable grip, since you don't have to hold onto the camera for fear of dropping it.
The wrist grip also provides a lot of additional stability for when you are using the live view mode and shooting movies - especially if you're using the flip and twist LCD to hold the D5000 at odd angles.
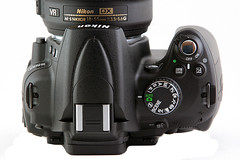
Controls and Operation

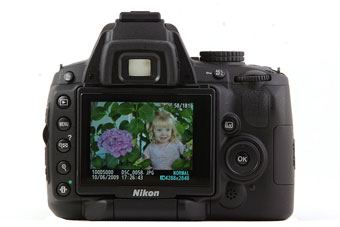
The back of the Nikon D5000 is dominated by the flip and twist LCD.
On the plus side for beginning SLR photographers, this doesn't leave a lot of room for additional buttons and dials - so those are kept to a minimum.
While some cameras - like the Nikon D90 - include a camera settings panel along the top, the D5000 omits this in order to conserve space.
Instead, all settings like aperture, shutter speed, white balance and ISO are displayed and changed using the LCD.
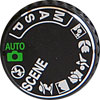
The main mode dial on the top of the camera lets you switch between full AUTO, Scene Modes (Landscape, Portrait, Action, Macro, etc.) and Manual Modes (Program, Aperture Priority, Shutter Priority and Manual).
The other few buttons spread around the camera body give you access to common features and settings.
| BUTTON | DESCRIPTION | IMAGE |
|---|---|---|
| Flash | Manually pops up the camera's built-in flash unit when one of the manual modes is selected (in auto modes, the camera pops up the flash automatically when it detects that the light is low). | |
| Function | You can assign different camera functions to this button (like ISO value, image quality, drive mode, etc.) or leave the default assignment: activating the self-timer. | |
| Delete Image | Lets you delete images during playback that aren't representative of your best work. | |
| Playback | Let's you review all of the photos and videos that are stored on the memory card. |  |
| Menu | Displays the camera's menus on the LCD screen so you can change settings. |  |
| Zoom Out | In playback mode, this lets you zoom out from the details of an image and it switches between single image and thumbnail views. |  |
| Zoom In | In playback mode, this lets you change from thumbnail view to a single image and lets you zoom in on the details of an image. |  |
| Info | Displays all camera settings on the LCD screen. |  |
| AE-L/AF-L | This helps when your primary subject isn't in the middle of the viewfinder. With auto-exposure/autofocus lock, you can point the D5000 straight at your subject, lock in both exposure and autofocus, and then re-compose without having to worry about the camera changing settings. |  |
| Live View (LV) | This button activates the camera's live view mode. |  |
| Exposure Compensation | Lets you intentionally over or under expose your images when you're using Program, Shutter Priority or Aperture Priority modes. |  |
Movie Mode
There are three main movie quality settings on the Nikon D5000:
- High Definition (HD) Widescreen: 1280 x 720 (16:9 aspect ratio)
- Standard Format: 640 x 424 (3:2 aspect ratio)
- Computer Playback: 320 x 216 (3:2)
The amount of video you can capture is limited:
- 5 minutes for HD
- 20 minutes for the other formats
Of course, the true amount of time that you'll be able to record video depends entirely on the size of the memory card you use and how much space you've got left on it.
In addition to movie length, there are a few other limitations:
- Focus is manual only - as subjects move back and forth you have to continually adjust focus using the ring on the lens
- Exposure is locked in - once you choose an exposure setting for the movie, that's it (at least until you capture another movie)
All this simply means that the video capture mode on the D5000 isn't like using a traditional compact video camera that can capture hours of footage and that focuses automatically.
While it took some practice, I eventually did get used to the manual focus and was able to capture movies that were nice and sharp.
The real benefit of the movie mode becomes apparent when you're faced with a scene that requires more than a still image.

One afternoon my son - ever the tolerant subject for my camera tests - was diving onto our bed and rolling around.
I grabbed a couple of still frames but quickly realized that these images weren't doing enough to capture the energy and enthusiastic flailing.
With the press of a button I switched into live mode, and with the press of another button started recording video of the event.
While it's certainly not award-winning video material, it illustrates how easy it is to switch from still mode to video mode with the D5000 - helping you to capture motion and sound when a still image just isn't telling the whole story.
A special note for all of you High Definition video enthusiasts: the file size of even a short HD video is enormous.
With a capture rate of about 2.67 MegaBytes per second, a one-minute video will eat up about 160 MegaBytes. By way of comparison, a 12.3 megapixel JPG image as the highest quality setting only takes up 5 MegaBytes.
While you can easily store hundreds of movies like this on modern hard drives, it's not so easy to share them online.
If you're thinking of getting the Nikon D5000 so that you can capture video clips and share them online with friends and family, just realize that uploading even short video segments will take hours.
On the plus side, this forces you to keep your videos short and sweet, so hopefully you won't bore your relatives too much with hours of footage.
I've uploaded several other Nikon D5000 Video Samples so you can get a sense of the video quality this camera can produce.
HDMI
If you own an HDTV with an HDMI input, then you can share videos and pictures with visitors in the comfort of your living room (rather than crowding everyone around a computer)
The D5000 has a mini HDMI connection - this either requires a special HDMI cable or an adaptor to switch from mini HDMI to regular HDMI.
You simply plug the camera into the television, select the appropriate HDMI signal, and then everything that you see on the camera's LCD can be displayed on the TV.
If you have a fairly large screen, be prepared to be stunned.
You're probably used to seeing your photos on a computer monitor or in 4x6 prints. But photos always have more impact when they're larger.
And it's not just the size of the images that's impressive - color and sharpness are also phenomenal. The brightness and contrast on a good HDTV will far exceed whatever your computer monitor is capable of.
In addition to still images, you can also watch movies that you've captured with the D5000.
High Definition movies are especially impressive, and have the sharpness and quality that you get when you watch a favorite DVD.
Finally, if you want to use your television as a gigantic preview monitor you can do so — just activate the camera's live view mode and compose your images using your TV screen.
This last usage of HDMI isn't terribly practical, but it does make for a great party trick.
Live View
The Nikon D5000 live view mode exhibits the limitations of live view apparent on other camera models:
- Autofocus in live view mode is extremely slow
- The shot-to-shot speed is also quite slow
This is not the case when live view is disabled - the D5000's 11-point autofocus locks on to all sorts of subjects within a fraction of a second. Response when you press the shutter release to take a photo is instantaneous.

Live view is slow, but helps capture unique angles
However, switch into live view mode and suddenly the camera has a tough time focusing on the most basic subject. That fraction-of-a-second response time now turns into several seconds.
During the several seconds that it takes for the autofocus to lock, a fleeting moment may be long gone.
The same delay that's apparent in the autofocus also takes place when you actually take a picture - the image is actually captured a fraction of a second AFTER you press the shutter release.
This means that if you're using live view and want to capture a precise moment in time, you have to take the delay into account.
In fact, the live view mode on the D5000 performs a lot like the standard mode on many compact digital cameras - if you're frustrated by the amount of time it takes your compact to grab a shot, then live view on the D5000 won't be a whole lot better.
At least the good news here is that you can turn live view off, at which point the D5000 locks focus and snaps photos with the speed that's only possible with a digital SLR.
If you do take lots of pictures of inanimate subjects (or animate ones that are willing to hold still) then the live view offers a lot of options:
- Image Zoom - you can zoom in on the image displayed on the LCD for very precise focus adjustment
- Face Detect Autofocus - you have to change a menu setting to activate it, but once turned on the autofocus will lock onto faces (but only those looking at the camera, not profiles)
- Grid Lines - white grid lines overlay on the display which is very helpful for landscape and architecture photographers who want to keep horizon lines level and buildings straight up and down
- Autofocus Location - you can move the autofocus square around the display to focus in on a specific subject, regardless of where the subject is placed in the frame
Flip and Twist (Articulated) LCD

The immediate question when you first see the LCD on the D5000 is this: flashy gizmo designed to drive the price of the camera up, or genuinely useful feature?
I have to admit that I'm having a hard time answering this one.
First, the only way to really take advantage of this fancy LCD is to put the camera in live view mode. This slows down the camera's performance considerably (as noted above).
Since that's the case, the articulated LCD can really only be used for subjects that are willing to stay still — it's pretty useless for action shots.
I did take plenty of photos from bizarre angles for the sake of this D5000 guide, but if I wasn't actively testing the camera, I'm not sure how often I'd leverage the flippy LCD.
Some of you reading this may already be thinking of hundreds of ways that you could use an LCD like this:
- Maybe you like taking pictures of plants and don't want to have to get down in the mud to capture them
- Maybe you enjoy taking pictures at concerts and want to snap pictures over the heads of the audience
- Perhaps you want to take informal street portraits with the camera at waist level so that it's not obvious you're taking pictures

It's especially useful for anyone who is really into self portraits and is fed up with taking pictures in a mirror.
Since the LCD rotates a full 180° you can hold the camera at arm's length, flip the LCD all the way around and clearly see your composition so that you can include yourself (and anyone else) in the frame.
In the end I'd say it comes down to this: if you're comparing the D5000 to other cameras without articulated LCDs and find that they're about the same price, then go for the D5000.
Even if you can't anticipate how you might use the LCD right now, having this feature means that you can grab images from low and high angles when the opportunities presents themselves.
ISO Performance
Like all other Nikon Digital SLR cameras, the D5000 produces very little image noise even at very high ISO settings.
The ISO range on the D5000 is from 100 to 6400, and this provides a lot of flexibility for shooting photos under a wide variety of lighting conditions.
For this Nikon D5000 Guide I deliberately took pictures under all sorts of light - full sun, full shade, indoors - and was constantly tweaking the ISO setting to get fast shutter speeds.
Reviewing the images later, I really couldn't tell which ones used high ISO settings unless I viewed them at 100% size on my monitor and carefully inspected them for the telltale signs of image noise.
While image noise is visible on a monitor at 100% size, it becomes invisible when you make prints that are 8x10 or smaller, or when you view the images at anything less than 100%.
The three images below are examples of ISO 200, 400 and 800. Since you won't be able to see any noise at all a the size of these photos presented on this page, feel free to click on each one for a larger image and judge the image quality for yourself.
 |
 |
 |
Exposure / Dynamic Range
The Nikon D5000 - like the D90 - includes 6 different levels of dynamic range control.

Nikon's term for dynamic range control is Active D-Lighting, and the 5 different levels include: Auto, Extra High, High, Normal and Low.
You also have the option of turning Active D-Lighting off.
In short, Active D-Lighting brightens shadows in high-contrast scenes to create an image with a more balanced look. This is used to compensate for the limited dynamic range of every digital SLR camera.
For more in-depth information on this topic, you can read my article on dynamic range.
Other versions of Active D-Lighting that I have played with have demonstrated that the effect is subtle and the same applies to the D5000.
Most people will probably be just fine leaving the Auto option enabled, and letting Active D-Lighting do what it wants.
For others who are curious about the minute differences that changes to this setting produce, the animation below shows the difference when Active D-Lighting is off and when it is on.
Pay special attention to the shadows and highlights - when Active D-Lighting is on, shadows brighten and highlights darken to create an image with less extreme contrast.
Image Quality and Size
Like the Nikon D90, the D5000 captures 12.3 megapixel images.
The two images below illustrate just how much detail is captured at the full 12.3 megapixel resolution - when you view D5000 photos at 100% size on your monitor you can really see the minute details.
| ORIGINAL IMAGE | 100% CROP |
|---|---|
 |
 |
With all 12.3 megapixels, you can print your photos at 16x20 inches. If you're not a print purist, you can also print much larger than this - image quality won't decrease until you get into absolutely huge print sizes - and I don't know of a lot of folks who adorn their walls with 20x30 prints.
For those who want to conserve some memory card space, you can also set the D5000 to capture JPG images at 6.9 megapixels and 3.1 megapixels (RAW images are always 12.3 megapixels).
I'd recommend the 6.9 setting for average everyday sorts of shots, since you can still make great 8x10 prints of these if you so desire.
In addition to size, you can also specify how much compression is applied to a JPG image: higher compression saves space, but does reduce image quality.
The following table shows the approximate file size and number of shots that you'd expect to be able to capture with a 2 GigaByte SD memory card:
| FILE TYPE | SIZE | MEGAPIX | COMPRESSION | FILE SIZE (MB) | # SHOTS |
|---|---|---|---|---|---|
| JPG | Large | 12.3 | Fine | 5.15 | 274 |
| Normal | 3.55 | 543 | |||
| Basic | 1.20 | 1,000+ | |||
| Medium | 6.9 | Fine | 2.98 | 484 | |
| Normal | 1.76 | 939 | |||
| Basic | 0.82 | 1,800+ | |||
| Small | 3.1 | Fine | 1.68 | 1,000+ | |
| Normal | 0.81 | 2,000+ | |||
| Basic | 0.47 | 3,800+ | |||
| RAW | n/a | 12.2 | n/a | 10.15 | 134 |
Color
When you capture images as JPG files, you have the option of tweaking the colors that the D5000 captures. The same color settings aren't applied to RAW files, since you use software to make color adjustments to these types of files.
Nikon has labeled their color adjustment settings as "Picture Controls" and there are 6 options available:
| PICTURE CONTROL | USE | SAMPLE |
|---|---|---|
| Standard | Default mode - mild image enhancement |  |
| Neutral | No image enhancement applied (assumes that you will use an editing program to adjust the image) |  |
| Vivid | Emphasizes primary colors by boosting contrast and color saturation |  |
| Monochrome | See below |  |
| Portrait | Creates softer images where the colors are optimized for skin tones |  |
| Landscape | Enhances the colors found in nature to create landscape images with impact |  |
Each one of these Picture Controls includes 5 default settings (selected by Nikon) that establish the "look" of the JPG image.
If you want, you can exert manual control over the factory defaults, and make adjustments to any one of them:
| SETTING | DESCRIPTION | VALUES |
|---|---|---|
| Sharpening | Images that are sharper have crisp edge definition while softer images look slightly blurry | From 0 (none) to 9 (max sharpening) |
| Contrast | High contrast images have dark shadows and bright highlights while low contrast images look uniformly gray | From -3 (low contrast) to +3 (high contrast) |
| Brightness | Increasing brightness makes colors more vivid, while decreasing it makes everything look dark | From -1 (low brightness) to +1 (high brightness) |
| Saturation | Images with higher saturation have intense colors while those will low saturation appear dull | From -3 (low saturation) to +3 (high saturation) |
| Hue | Shifting the hue can dramatically alter how the camera renders colors | From -3 to +3 |
If you're really ambitious - or just really picky about color - then you also have the ability to create 9 custom Picture Controls with the exact Sharpening, Contrast, Brightness, Saturation and Hue that you choose.
You can name these custom Picture Controls anything you want for easy reference.
Black and White (Monochrome)
Monochrome enthusiasts have plenty of options to choose from on the Nikon D5000.
First, they can just choose to set the camera in straight black and white mode.
If that's not enough, a variety of digital filters can be applied to the image (just like using a colored filter with black and white film). The filters include yellow, orange, red and green.
While the filter effects can enhance a straight black and white image, you may want to add a touch of color to the entire image.
Good news: there are plenty of tinting options that can be applied to a monochromatic image:
| TINT | SAMPLE | TINT | SAMPLE |
|---|---|---|---|
| Sepia |  |
Cyanotype |  |
| Red |  |
Yellow |  |
| Green |  |
Blue Green |  |
| Blue |  |
Purple Blue |  |
| Red Purple |  | ||
In-Camera Photo Editing
Nikon's term for editing the look of your images is "Retouch".
While some retouch settings are designed to correct flaws in the image quality, others are designed to artificially enhance your photos.
Regardless of which one you use, all of the retouch settings mimic the same changes and corrections that you can make with a lot of image editing computer software.
| RETOUCH OPTION | DESCRIPTION |
|---|---|
| D-Lighting | Brings out detail in the shadows (similar to what Active D-Lighting does when you take a photo) |
| Red-eye Correction | Removes glowing red eyes from portrait subjects |
| Trim | Lets you crop photos to remove blank space around your primary subject |
| Monochrome | Converts any color image into black and white, sepia, or cyanotype (blue tinted monochrome) |
| Filter Effects | Allows you to manipulate the colors in your images to enhance reds, greens and blues |
| Color Balance | Selectively increase the amount of green, amber, magenta or blue in your photo |
| Small Picture | Create reduced-size versions of your images at 640 x 480, 320 x 240 or 160 x 120 (great for e-mail) |
| Image Overlay | Allows you to combine two RAW files where the end result is a composite of the two original images |
| RAW Processing | Converts RAW files into JPG files (allowing you to edit and enhance the RAW image before it is saved) |
| Quick Retouch | Automatically adjusts color, contrast and shadow detail |
| Straighten | Corrects images where the horizon line is not level |
| Distortion Control | Corrects the optical distortion that is apparent in some lenses (called barrel distortion and pincushion) |
| Fisheye | Makes your image appear as though it was taken with a fisheye lens |
| Color Outline | Creates a color outline of the image subject |
| Perspective Control | Straightens perspective of tall building when captured at ground level |
| Stop-Motion Movie | Makes your image appear as though it was taken with a fisheye lens |
| Side-by-side comparison | Allows you to see your unedited image and the edited one next to each other for comparison |
I personally prefer to use an editing program like Adobe Elements because I find it much easier to see the changes I'm making to an image on a 19 inch monitor rather than a 3 inch LCD.
I think that the retouch features exist primarily for those who want to do some quick photo editing in the field, and for those who want to quickly edit images without having to camp out in front of the computer for hours.
Lenses
The kit lens that ships with the Nikon D5000 is an 18-55mm f/3.5-5.6 with Vibration Reduction (VR).
Another common two-lens package includes this lens along with a 55-200mm f/3.5-5.6 VR for greater reach
| WIDE ANGLE (18mm) | TELEPHOTO (55mm) |
|---|---|
 |
 |
This lens works well as a standard walk-around lens, and it's a good option for landscapes and portraits.
It won't work well for wildlife and closeup (macro) photography, so if you're into these types of photography, consider a different - or second - lens.
For wildlife photography, you'll want a lens with a longer focal length to get close to animals that are far away. A good, relatively inexpensive option is the Nikon 75-300mm f/4.5-5.6G ED-IF AF-S VR.
Photographers who enjoy extreme closeups will benefit from a dedicated macro lens, like the Nikon 60mm f/2.8G ED AF-S Macro.
Finally, those who want it all (from wide angle to telephoto) should consider the Tamron 18-270mm f/3.5-5.6 VC. This lens has a focal range that is equivalent to a 15x zoom on a compact digital camera. It also has image stabilization (to minimize the effect of camera shake) and its own focusing motor (so autofocus will work with the D5000).
The Pros and Cons
| Pros | Cons |
|
|
Summary
The Nikon D5000 is a real joy to use.

It's a huge improvement over the D60 - if you're considering these two cameras it really is like comparing apples to oranges.
The improved autofocus system, live view mode, and HD video capture all make the D5000 a more robust option than the D60 - but only if you really are going to leverage all of these features.
The flip and twist LCD is a bit of a novelty item, but it's like this: once you have an LCD that does this you FIND all sorts of ways to use it.
Image quality (especially at high ISO settings) is superb - what we've come to expect from Nikon digital SLRs in this price range.
What's even better is the quality of the video this camera can capture, provided you have the means to play it back. HD video files are enormous and can make even modern computers seem sluggish.
One of the best ways to show of your D5000 videos is to attach the camera to an HDTV with an HDMI cable, but once the videos have been transferred from card to computer this is no longer an option.
The best part: even though the D5000 shares many of the same features as the D90, it costs a fraction of the price.
This makes it an attractive option to those just making the transition from point-and-shoot to digital SLR who don't ever expect to leverage all the more advanced features and custom settings available on the D90.
Think of it this way — you can pick up a D5000 with TWO lenses for less than the price of a D90 with ONE. This should cover your photographic needs for a long time to come.
Nikon D5000 Photo Samples
Price Analysis
The D5000 is very reasonable priced given the amount of functionality that's included in the camera, and it's also significantly less expensive than the Nikon D90 (which retails with a lens for about $1,150 USD).
While the D90 has a more professional build quality, it is also larger and heavier than the D5000 and it lacks the flip and twist LCD.
| Package | Price | Compare At |
|---|---|---|
| Nikon D5000 body only (no lenses) | $730 USD | Amazon | Adorama | B&H |
| Nikon D5000 with 18-55mm VR lens | $775 USD | Amazon | Adorama | B&H |
| Nikon D5000 with 18-55mm VR and 55-200mm VR lenses | $950 USD | Amazon | Adorama | B&H |
Other Nikon D5000 Packages
Accessories
Memory Card
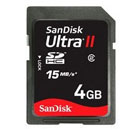
The first extra you're going to need with a new Nikon D5000 is a memory card, since none are included with the basic camera kit.
The D5000 uses SD Memory cards, and the good news is that today there are plenty to choose from in a variety of capacities.
If you're only planning on using the camera for short trips and don't intend to use the RAW mode a lot, then a 4 GigaByte card should be fine.
Prolific shooters, those who exclusively capture RAW images and travelers who enjoy extended vacations should consider cards with more capacity like 8 GigaBytes and even 16 Gigabytes.
Batteries
The Nikon D5000 uses a rechargeable lithium Ion EN-EL9a battery.
Since the live view LCD and video capture mode tend to eat up the battery charge fast, it's a good idea to have a spare on hand when the battery in the camera runs out.
Nikon has not provided any battery grip that is compatible with the D5000.
Triggers
Remote triggers are best used when you have the camera locked on a tripod and are either taking photos with very long exposure times (where even touching the camera can result in a blurry photo) or when you would like to be included in the group portrait.
One of the following options keeps you tethered to the camera, while the other lets you roam:
- The MC-DC2 remote release cord lets you fire the camera from no more than 3 feet (1 meter) away in any direction
- The ML-L3 wireless remote lets you step away from the camera even further, up to about 16 feet (4.9 meters) in front of the camera
Related Links
| Digital SLR Home | Other Camera Guides |

|